Managing skins using the skin manager
Users with the Administrator functionality level manage skins for all users. The skin manager controls skins and their settings. To access the skin manager, choose Customization on the Information Console banner as shown in Figure 2-12.

The default skin manager looks like the one in Figure 2-13.
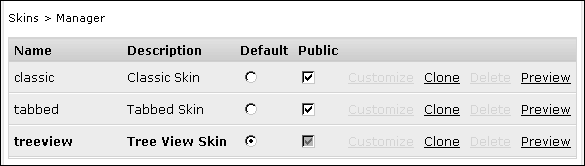
Figure 2-13 Skin manager, showing the default skins
Table 2-7 describes the features of the skin manager.
|
Displays the Skin—Customize page to allow customizing for that skin. The skins shipped by default with Actuate Information Console cannot be customized.
|
|
|
Selects the skin used for new users by default without affecting existing users.
|
|
|
Deletes the skin after confirmation. Skins shipped with Actuate Information Console and the default skin cannot be deleted. To delete the current default skin, first choose another skin as the default.
|
|
|
Applies the skin immediately. When the current session times out, the skin reverts back to the user’s original skin. The user’s current skin is shown in bold text.
|
|
|
Makes the skin available for all users by adding the skin to the list on the Options page. If a public skin becomes private, users using the skin revert to the default skin. The default skin is always public.
|