How to schedule a document job
Figure 4-15 Selecting the categories view

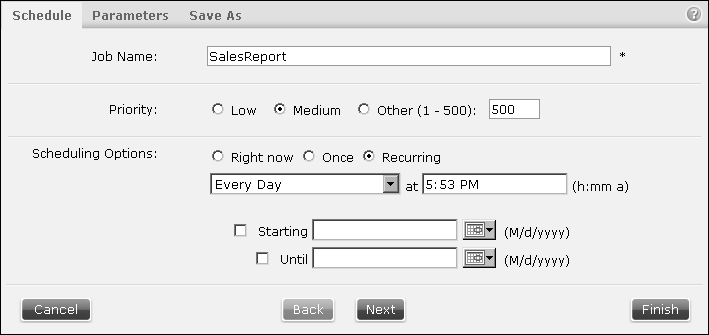
Figure 4-16 Scheduling a report
|
n
|
Accept the default job name or type a new name. To distinguish multiple run schedules for the same report, assign a unique name for each job.
|
|
n
|
To set the job priority, select Low, Medium, or High, or select Other and type a priority value.
|

|
o
|
To generate the report once on a specified day and time, select Once. Type the date-and-time value, or choose Calendar to select a date.
|
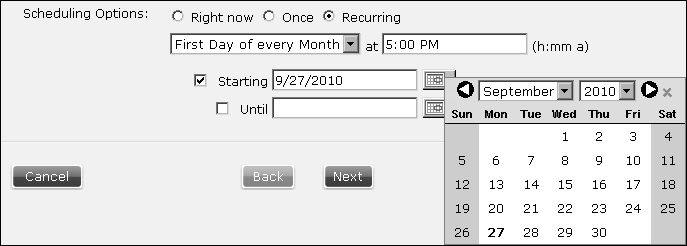
Figure 4-17 Scheduling options
Select an interval, such as the first day of every month, and a time to run the report. Optionally, select a start and end date during which the run job repeats.
|
4
|
Choose Next. If the file job requires parameters, Parameters appears, as shown in Figure 4-18. Otherwise Save as appears.
|

Figure 4-18 Selecting parameters
|
5
|
Select or type values for required parameters. Use the Query by Example syntax if the parameter is an ad hoc parameter, as explained later in this section. Choose Next to specify output settings. Save As appears, as shown in Figure 4-19.
|
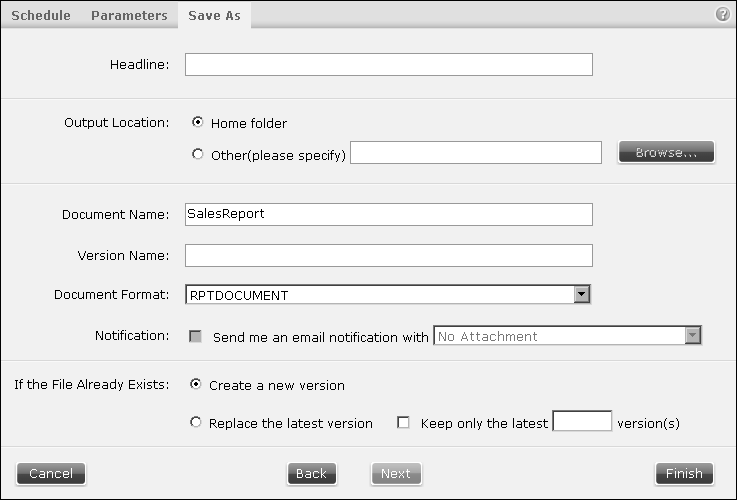
Figure 4-19 Specifying Save As settings
|
n
|
In Headline, type a description of the file job. This description is included in any channel notifications and is saved with the job report.
|
|
n
|
In Output location, select a location to save the document or select the Home folder location. Other locations are available by typing a new location, navigating to a new save location or by using a date-and-time expression as explained later in this section.
|
|
n
|
In Version name, optionally type a unique version name. When you schedule a file job to run on a recurring basis, adding a date-and-time expression creates unique document, directory, or version names, as explained later in this section.
|
|
7
|
Select the document format to generate. Each output type has various conversion options, as shown in Figure 4-20. Additional conversion options appear depending on the selected document format.
|
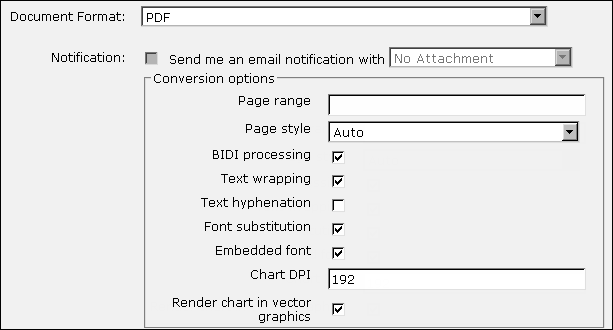
Figure 4-20 Selecting output conversion options
|
8
|
Optionally receive an e-mail notification when the file job runs, select Send me an email notification. Select the attachment format to attach a copy of the file job output to the email notification. The user’s email address as configured from the Information Console’s user options is used to send the email. If the email notification option is not available, contact the administrator.
|
|
9
|
Specify a resolution if the file name already exists in the selected location. Select Create a new version to create a new version of the report and retain existing versions. Optionally choose how many previous versions to retain by selecting Keep only the latest. Type the number of versions to keep.
|
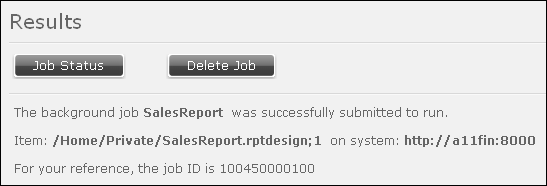
Figure 4-21 Confirming submission of a scheduled job
Optionally, the user can schedule the document file by choosing Schedule, from the file icon’s hover menu. The hover menu appears in the Details, Icons, or List view when the mouse is over the file icon.