Planning a campaign involves organizing a set of goal‑oriented activities. Creating campaign structure by defining a strategy and cells establishes a manageable path toward completing the campaign. Defining campaign properties completes the campaign structure. Campaign workflow planning supports completing multiple activities toward a campaign goal.
This section describes how to define campaign strategies, properties, and cells.
About campaign properties
You define a campaign by setting the following properties:
General Data
A code, name, and description that identify a campaign
Dates
Calendar dates on which activities in a campaign begin and end
Resolution
Database table that stores records on which a campaign runs
Domains
A selected segment of data on which a campaign runs
Responses
Records generated as a result of campaign activities
Creating a strategy
A campaign strategy names and describes one or multiple campaigns. A strategy supports grouping multiple campaigns. BIRT Analytics Campaign Workflow Planning supports creating a branched hierarchy containing strategies and campaigns.
How to create a strategy for a campaign
1 In Campaign Workflow, select Planning.
2 Right‑click Strategies and choose New Strategy.
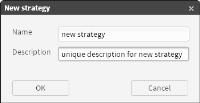
3 In New Strategy, type a name and description of a unique strategy, as shown in Figure 7‑9.
Figure 7‑9 Creating a new strategy for a campaign
4 Choose OK.
Creating a campaign
Creating a campaign requires a strategy. As a best practice, establish a strategy, then create one, or multiple campaigns within the scope of that strategy. Modify the scope of a strategy as necessary, to accommodate expanding campaign activities.
How to create a new campaign
1 Choose Campaign Workflow—Planning.
2 In Planning, right‑click a strategy and choose New Campaign.
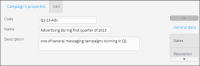
3 In Campaign Detail—Campaign’s Properties—General Data, shown in Figure 7‑10, type the following information:
In Code, specify only one campaign.
In Name, type a name for this campaign code.
Optionally, describe the campaign name and code.
Figure 7‑10 Adding general properties for a new campaign
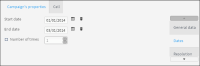
4 In Campaign’s Properties—Dates, shown in Figure 7‑11, select the following options:
In Start Date and End Date, select values representing dates on which campaign activities begin and finish.
Optionally, select Number of times. Then, select a number to set how many times to repeat all campaign activities between the defined start and end dates.
Figure 7‑11 Adding a date range for a new campaign
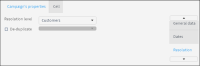
5 In Campaign Properties—Resolution, select a resolution level, as shown in Figure 7‑12.
Figure 7‑12 Selecting a resolution level for a new campaign
6 Optionally, to limit the resolution level of a campaign, select De-duplicate and choose a column name from the list.
For example, consider a campaign designed to contact all customers by setting the resolution level to Customers table. To limit customers contacted to one‑per‑household, limit the campaign resolution by selecting De‑duplicate and selecting Household ID.
7 In Campaign’s Properties—Domains, define any selections to include or exclude in the campaign, as shown in Figure 7‑13.
Figure 7‑13 Defining a selection to exclude for a new campaign
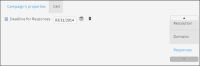
8 In Campaign’s Properties—Responses, select Deadline for Responses. Then, select a date value to set a deadline for responses to be included in this campaign, as shown in Figure 7‑14.
Figure 7‑14 Setting a response collection deadline for a new campaign
9 In Campaign detail, choose Save.
Saving a campaign locks property modification for all users except the user creating the campaign.
How to unlock a campaign
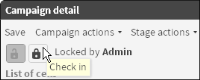
To unlock a campaign for editing by other users, choose Check in, as shown in Figure 7‑15.
Figure 7‑15 Unlocking a campaign for modification
No blocked appears for an unlocked campaign, as shown in Figure 7‑16.
Figure 7‑16 Examining an unlocked campaign
How to exclude a segment of records from a campaign
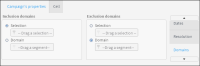
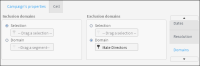
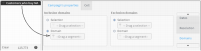
1 In Campaign Properties—Domains, select Domain in Exclusion domains, as shown in Figure 7‑17.
Figure 7‑17 Selecting exclude domain for a campaign
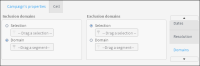
2 From Scratchpad, drag a data segment and drop it in Exclusion domains—Domain.
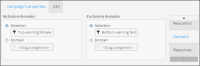
For example, to exclude all male directors from a campaign, create a segment that includes only male directors. Then, drag the Male Directors segment from Scratchpad and drop it Exclusion domains, as shown in Figure 7‑18.
Figure 7‑18 Excluding a segment from a campaign
In Campaign detail, choose Save.
How to define a segment as a campaign domain
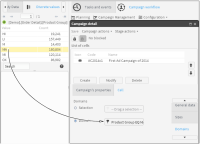
1 In Campaign Properties—Domains, select Domain in Inclusion domains, as shown in Figure 7‑19.
Figure 7‑19 Selecting include domain for a campaign
2 From Scratchpad, drag a data segment and drop it in Inclusion domains—Domain.
For example, to define the domain of a campaign to include only those customers who buy product MA:
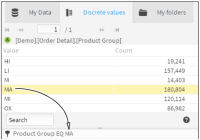
1 In My Data, find the Product Group MA value in the Order detail table.
2 Drag Product Group MA and drop it in Scratchpad, as shown in Figure 7‑20.
Figure 7‑20 Selecting a segment for a campaign domain
3 Change the resolution of Product Group EQ MA segment to Customers, as shown in Figure 7‑21.
In Scratchpad, right‑click Product Group EQ MA and choose Change resolution level.
Figure 7‑21 Changing the resolution level for a segment
In Change resolution level, select Customer table and choose OK.
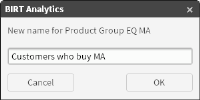
Rename the segment Customers who buy MA, as shown in Figure 7‑22.
Figure 7‑22 Renaming a segment
4 In Campaign Properties—Domains, in Inclusion Domain, select Domain.
5 Drag a segment from Scratchpad and drop it into Inclusion domains—Domain, as shown in Figure 7‑23.
Figure 7‑23 Including a segment as a campaign domain
3 In Campaign detail, choose Save.
About campaign cells
A campaign cell defines an action executed according to defined properties for all records in a segment. The action is defined to accomplish a specific goal within a campaign. For example, you can set cell properties that generate a specific text message to each male customer who purchased an Android phone. A cell may be set to execute at a specific time or coincident with a specific event during a campaign. A cell also may collect response data associated with records in a segment, according to business rules defined as cell properties.
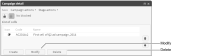
To modify or delete an existing cell, in Campaign Detail—List of cells, select a cell and choose Modify or Delete, as shown in Figure 7‑24.
Figure 7‑24 Modifying a campaign cell
How to create a cell in a campaign
1 In Campaign Detail, in List of cells, choose Create.
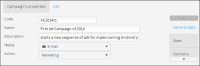
2 In Cell—General data, provide descriptive information for the cell, as shown in Figure 7‑25.
1 In Code, specify a cell for the campaign.
2 In Name, type a name for this campaign cell.
3 In Description, describe this campaign cell.
4 In Media, select a media type.
5 In Action, select an action type.
Figure 7‑25 Adding descriptive information to a campaign cell
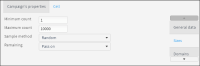
3 In Cell—Sizes, limit the size of the campaign using the following steps, as shown in Figure 7‑26:
1 In Minimum count, set a low value in the range of records for which the cell executes.
2 In Maximum count, set a high value in the range of records for which the cell executes.
3 In Sample method, select the type of method by which the cell selects records.
4 In Remaining, select one of the following options:
Pass on. This option saves cell result records for use in subsequently executed cells.
Exclude from others. This options prevents saving cell result records.
Figure 7‑26 Adding size and sampling properties to a campaign cell
4 In Cell—Domains, define the campaign cell domain. To specify a selection or domain for the cell, drag a selection or a segment from Data Tree and drop it in Selection or Domain, as shown in Figure 7‑27.
Figure 7‑27 Defining the domain for a campaign cell
5 In Cell—Control, define a control cell and set parameters. Select a control type, sample size, and sample method, as shown in Figure 7‑28.
Figure 7‑28 Defining a control cell
To determine the effectiveness of a cell, compare cell results to the control cell.
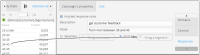
6 Optionally, in Cell—Responses, select Implied response rules. Then, define a business rule using a segment from which responses generate, as shown in Figure 7‑29.
Figure 7‑29 Adding a response rule to a campaign cell