The Synchronize option in BIRT Admin allows the administrator to update the application database to contain the most recent changes in the BIRT Analytics Engine repository. Execute this option after making a change in the analytical repository that alters the database structure, such as the addition, modification, or deletion of a column, table, or other data object. Synchronizing is also required when you change the data, after increasing, reducing, or modifying the records in a database.
After synchronizing the data you must set the privileges for the users or groups to provide access to the database. In the BIRT Analytics security options list, the ACL to objects option allows the administrator to create, modify, or delete a security group or access control list (ACL) and manage privileges over database objects.
How to synchronize data using BIRT Analytics Admin
To do the synchronization you must have access to the BIRT Analytics Admin application.
1 Using your web browser, connect to the following site:
http://localhost/qadmin
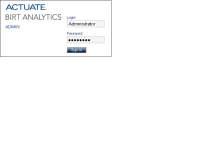
The BIRT Analytics login screen appears as shown in Figure 2‑11.
Figure 2‑11 Logging in to BIRT Analytics Admin
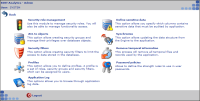
2 In Login, type Administrator. In Password, type PASSWORD. Choose Sign in. The BIRT Analytics Admin page appears, as shown in Figure 2‑12.
Figure 2‑12 Accessing the security administration
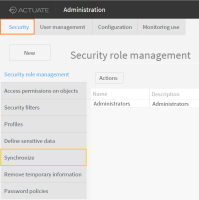
3 In BIRT Analytics Admin, choose Security. The Security page appears, as shown in Figure 2‑13.
Figure 2‑13 Accessing the synchronize settings
4 In Security, choose Synchronize.
5 In Synchronize, choose Synchronize again, as shown in Figure 2‑14.
Figure 2‑14 Updating the data structure from the engine
6 Choose Back when the synchronization has finished.
7 To make a synchronized database visible to a user security group, complete the following steps:
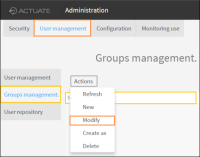
1 In BIRT Analytics Admin, choose ACL to objects.
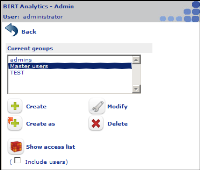
2 Select a security group for which to assign access privileges. Then, choose Modify, as shown in Figure 2‑15.
Figure 2‑15 Selecting a user security group
A list of available databases appears, as shown in Figure 2‑16.
Figure 2‑16 Granting a user group access privilege to a database
3 Select a database to which you will grant a user group access privileges. For example, select the SalesData database.
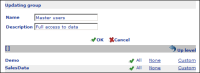
4 To grant a group full access to a database, choose All for that database. The modifications appear in Updating group. For example, Figure 2‑17 shows a group called Master users, modified to have all privileges for, or full access to, the SalesData database.
Figure 2‑17 Updating group
5 Choose OK.
6 Choose Back.
How to verify functionality activation
To verify that all functionalities are activated for a user group, complete the following steps.
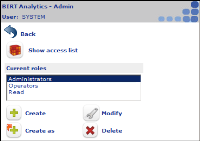
1 Choose a security role, as shown in Figure 2‑18.
2 Select a user group, for example Administrators
3 Choose Modify.
Figure 2‑18 Selecting the Administrators role
4 In Functionalities, de-select General. Then, select General, as shown in Figure 2‑19.