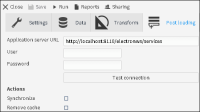
BIRT Analytics Loader provides a Post loading option located in the Post loading tab, shown in Figure 2‑11. Use Post loading to schedule the synchronization process to run when data loading finishes. You can also clear the cache after data load to temporary information.
Figure 2‑11 Post loading tab
Post loading requires the URL of the ApplicationWS server, authentication and the requested actions. After your data is loaded in to FastDB, use the BIRT Analytics Administration tool to assign access permissions on data objects.
Enable Post loading—Actions—Synchronize to synchronize the FastDB and ApplicationWS database after loading data.
Enable Post loading—Actions—Remove cache to remove the old data structure.
Synchronizing data using BIRT Analytics Administration
BIRT Analytics Administration is available at the following URL:
http://localhost:8110/baadmin
Replace localhost with the name or IP address of the computer where you installed BIRT Analytics when you access BIRT Analytics from another computer on your network.
The Synchronize option in BIRT Analytics Administration tool enables the administrator to update the application database to add the most recent changes in the BIRT Analytics Engine repository.
The Remove temporary information option is used for clearing the cache after a loading process has finished.
The Access permissions on objects option is used for setting database access privileges for users and user groups.
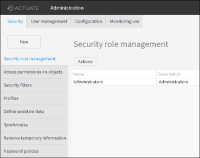
Figure 2‑12 shows the synchronize option, along with the Remove temporary information and Access permissions on objects options available in the “Security” tab of BIRT Analytics Administration.
Figure 2‑12 Reviewing data object permissions in Administration
Setting database access privileges
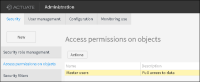
In the case of a synchronization where structural changes have occurred in the database, (such as changing, adding or removing database objects), set the privileges for the users or groups to provide access to the database using the BIRT Analytics Administration tool. Figure 2‑13 shows user groups.
Figure 2‑13 Setting data access permissions in Administration
Select a user group and choose Actions - Modify.
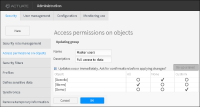
Figure 2‑13 shows example data objects and access permissions. You can set permissions for entire databases and for specific data objects within a database.
Figure 2‑14 Setting data access permissions in Administration