How to specify a new data partition
In Configuration Console, use the default data partition that installs with iHub or specify a new partition, then create the Encyclopedia volume and bind it to the partition.
1 To delete the default partition and specify a new data partition, perform the following tasks:
1 Choose Advanced view.
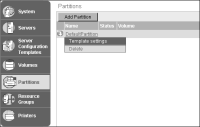
2 From the side menu, choose Partitions. On Partitions, point to the arrow next to DefaultPartition and choose Delete, as shown in
Figure 6‑31.
Figure 6‑31 Deleting DefaultPartition
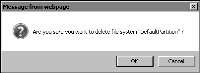
Choose OK to confirm the deletion of DefaultPartition, as shown in
Figure 6‑32.
Figure 6‑32 Confirming to delete DefaultPartition
2 To specify a new data partition, perform the following tasks:
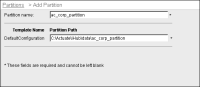
1 Create a directory for the partition on the physical drive of the machine or storage device that iHub can access. For example, create a directory in the following path:
C:\Actuate\iHub\data\ac_corp_partition
2 From the advanced view of Configuration Console, choose Partitions.
3 In Partitions, choose Add partition.
4 In Partition name, specify a name. For example, name the partition ac_corp_partition.
5 In Partition Path, specify the fully qualified path to the partition directory, as shown in
Figure 6‑33.
Choose OK.
Figure 6‑33 Adding a new data partition
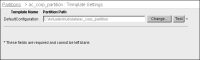
6 In Partitions, choose the new partition, ac_corp_partition, from the list of partitions.
7 In Server Settings, choose Test, as shown in
Figure 6‑34.
Choose OK.
Figure 6‑34 Testing a new data partition
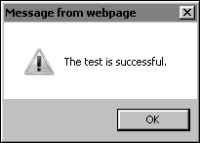
If the test succeeds, a success message appears, as shown in message in
Figure 6‑35. Choose OK.
Figure 6‑35 Viewing test successful message
If the test fails, check that the directory named in the partition path exists.