How to perform a new installation of BIRT iHub in Windows
To install iHub, perform the following tasks:
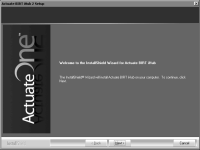
1 Download the iHub distribution package from an FTP software distribution site. Extract the files. Run the self-extracting executable file, ActuateBIRTiHub.exe. The welcome message appears, as shown in
Figure 2‑1. Choose Next.
Figure 2‑1 Viewing the welcome message
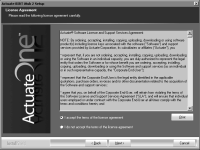
2 Read and accept the license agreement, as shown in
Figure 2‑2. Choose Next.
Figure 2‑2 Accepting the license agreement
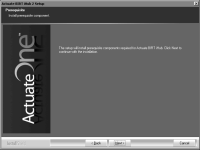
3 The setup installs the prerequisite components that BIRT iHub requires, as shown in
Figure 2‑3. Choose Next.
Figure 2‑3 Installing prerequisites
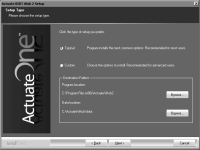
4 In Setup Type, select Typical to install the default configuration for a stand‑alone iHub, as shown in
Figure 2‑4. Alternatively, choose Custom for one of the following reasons:

To install individual iHub components
To install a cluster node
To install a custom configuration for a stand‑alone iHub and a supported relational database management system (RDBMS), such as DB2, Microsoft SQL Server, Oracle, or a pre-existing PostgreSQL instance for the Encyclopedia volume metadata database
To use an optional Open Security application to control access to iHub using an external system, such as an LDAP server
In Destination Folder, accept the default or choose a new destination folder for the Program and Data locations.
iHub uses the Program location to resolve the paths to all the binaries that it launches. The environment variable, AC_SERVER_HOME, points to the location of the iHub binaries. The default path for the program location is C:/Program Files (x86)/Actuate/iHub2.
iHub uses the Data location to store the iHub logs, iHub Encyclopedia, including the PostgreSQL data, and all other run-time data. The environment variable, AC_DATA_HOME, points to the location of the iHub data. The default path for the data location is C:/Actuate/iHub/data. Choose Next.
Figure 2‑4 Specifying typical or custom setup type
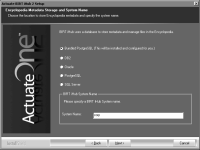
5 In Encyclopedia Metadata Storage and System Name, select the type of Encyclopedia volume metadata database to install, as shown in
Figure 2‑5. This installation example demonstrates installing the bundled OOTB PostgreSQL database. In System Name, type a name for the BIRT iHub System name. iHub assigns this name to the default Encyclopedia volume. Additionally, iHub inserts this name into the names iHub creates for the Encyclopedia volume schema and the iHub system schema. Choose Next.
Figure 2‑5 Selecting the Encyclopedia volume metadata database to install
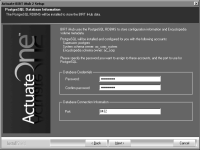
6 On PostgreSQL Database Information, in Database Credentials, type and confirm a password, as shown in
Figure 2‑6. iHub creates the following accounts automatically, using this password for each account:
postgres
The PostgreSQL database superuser. The database superuser administers the PostgreSQL relational database management system (RDBMS).
ac_<BIRT iHub System name>_system
The System schema owner. iHub creates the iHub system schema and gives it this name. The installation program substitutes <BIRT iHub System name> with the system name you specified in the previous step.
ac_<BIRT iHub System name>
The Encyclopedia schema owner. iHub creates the Encyclopedia volume schema using ac_<BIRT iHub System name>.
In Port, accept the default value of 8432. Alternatively, type a different port. Choose Next.
If you receive a message stating that the Database Connection Information port is used by another application, type a different port number, such as 8433.
Figure 2‑6 Specifying PostgreSQL database information
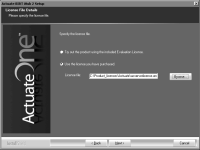
7 In License File Details, select Use the license that you purchased. Choose Browse then navigate to and choose the license file, as shown in
Figure 2‑7. Alternatively, choose Try out the product using the included evaluation license if you do not have a purchased license. Choose Next.
Figure 2‑7 Specifying the license file
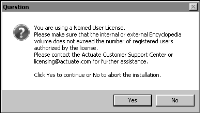
If installing using a named-user license, a prompt appears advising you to check that the volume does not exceed the number of registered users authorized by the license, as shown in
Figure 2‑8.
Figure 2‑8 Viewing the named-user license question
Choose Yes to continue the installation.
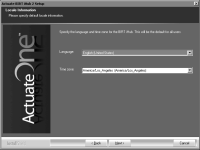
8 In Locale Information, choose Next to accept the default language and time zone, as shown in
Figure 2‑9.
Alternatively, choose the language and locale settings for your region.
Figure 2‑9 Specifying locale information
9 In Specify Profiles, type the user name, password, and confirm the password for the account used to start the BIRT iHub service, as shown in
Figure 2‑10. The account must be a member of the Administrators group. Actuate recommends that you limit access to this account for security reasons.
If you are installing on Windows 2003, specify a user account that is in the Power Users not the Administrators group. A user account in the Administrators group cannot start the Actuate PostgreSQL for BIRT iHub service.
Accept Automatically start iHub when Windows boots, as shown in
Figure 2‑10. If you deselect this option, you must start the service manually from Windows Services. Choose Next.
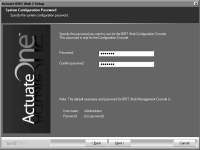
10 In System Configuration Password, type and confirm a password for Configuration Console, as shown in
Figure 2‑11. For both Configuration Console and Management Console, the default user name is Administrator. The Administrator account for Management Console has no initial password. You can log in to these consoles and change the password settings after installing iHub. Choose Next.
Figure 2‑10 Specifying an account for running the iHub service
If prompted to add Log on as a service privilege, choose Yes.
Figure 2‑11 Specifying the password for using Configuration Console
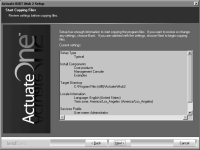
11 In Start Copying Files, review the settings shown in
Figure 2‑12. Choose Next.
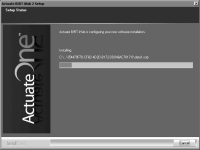
Setup Status displays an indicator showing how the installation is progressing, as shown in
Figure 2‑13.
Figure 2‑12 Reviewing settings before copying files
Figure 2‑13 Viewing setup status
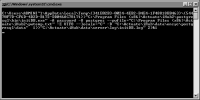
During installation, a command prompt appears, displaying the run-time commands and messages from the initialization process of the PostgreSQL RDBMS and Encyclopedia volume schema, as shown in
Figure 2‑14.
Figure 2‑14 Initializing the PostgreSQL RDBMS
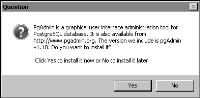
A prompt appears, asking if you want to install the pgAdmin database administration tool for the PostgreSQL RDBMS, as shown in
Figure 2‑15. Choose Yes.
Figure 2‑15 Choosing to install the pgAdmin tool
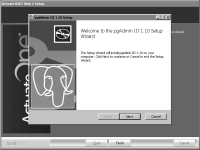
Actuate BIRT iHub 2 Setup appears, then pgAdmin III Setup appears, as shown in
Figure 2‑16.
Figure 2‑16 Viewing Actuate BIRT iHub and pgAdmin III Setup
12 In pgAdmin III Setup, perform the following tasks:
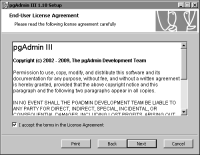
2 In End-User License Agreement, select I accept the terms in the License Agreement, as shown in
Figure 2‑17. Choose Next.
Figure 2‑17 Accepting the license agreement
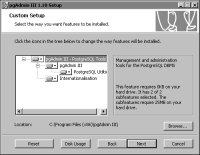
3 In Custom Setup, review the features to be installed, as shown in
Figure 2‑18. Choose Next.
Figure 2‑18 Viewing the features to be installed
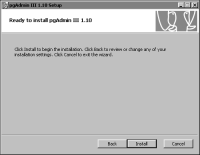
4 In Ready to Install pgAdmin III, shown in
Figure 2‑19, choose Install.
Figure 2‑19 Choosing to install pgAdmin III
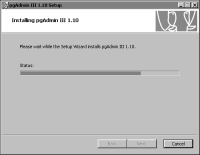
Installing pgAdmin III appears, as shown in
Figure 2‑20.
Figure 2‑20 Installing pgAdmin III
5 When Completed the pgAdmin III Setup Wizard appears, as shown in
Figure 2‑21, choose Finish to exit the wizard.
Figure 2‑21 Choosing Finish
Choose Finish to exit the wizard, as shown in
Figure 2‑22.
Figure 2‑22 Exiting the installation wizard
13 The installation program prompts you to install the online help from the following location, as shown in
Figure 2‑23:
http://www.actuate.com
Figure 2‑23 Viewing the install online help and manuals prompt
To install the online help and PDF manuals from this location, in Windows, choose Start➛ Actuate➛Update Documentation.
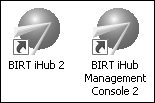
The installation program installs shortcuts on the desktop, as shown in
Figure 2‑24.
Figure 2‑24 Viewing BIRT iHub shortcuts on the desktop
These shortcuts provide access to the following iHub components:
BIRT iHub Management Console 2
Launches Management Console to set up user accounts and run designs.
BIRT iHub 2
Opens Welcome to Actuate BIRT iHub from which you can log in to Information Console to perform tasks, such as accessing folders and viewing documents.