Performing a cluster installation using the wizard
The following section describes how to install an iHub cluster node in the Linux operating system using a Linux system as the example.
How to install a cluster node in Linux
1 Download the required files from the FTP software distribution site. Extract the files.
2 To install the server files, execute the isinstall script:
sh ./isinstall.sh
The script displays a series of prompts. Respond to the prompts as described in the following procedures.
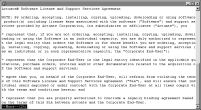
3 The license agreement appears, as shown in
Figure 5‑1.
Figure 5‑1 Reviewing the license agreement
4 Read the license agreement and press Enter to continue the installation. At the prompt, type y for yes if you accept the licensing terms, as shown in
Figure 5‑2.
Figure 5‑2 Accepting the licensing terms
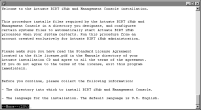
5 The introduction to the installation appears, as shown in
Figure 5‑3.
Figure 5‑3 Reviewing the introductory information
6 Press Enter after reviewing the introductory information, as shown in
Figure 5‑4.
Figure 5‑4 Finishing the review of introductory information
7 Press Enter to accept the default location for the installation binaries, as shown in
Figure 5‑5. Alternatively, type a different directory and press Enter.
The installation program creates the AcServer directory in your chosen location and installs the files.
Figure 5‑5 Specifying the installation directory
8 Press Enter to accept the default installation directory, AC_SERVER_HOME
/data, for the iHub data as shown in
Figure 5‑6. Alternatively, choose a different directory.
iHub uses this data location to store the iHub Encyclopedia volume data, including PostgreSQL metadata, logs, and other files. The default path is AC_SERVER_HOME/data, which is referred to in the iHub documentation by the environment variable AC_DATA_HOME.
Figure 5‑6 Specifying the data installation directory
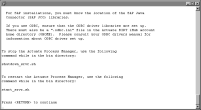
9 Press Enter to accept the default option of creating the directory for data, as shown in
Figure 5‑7. Alternatively, type n for no, or q to quit, and press Enter.
Figure 5‑7 Creating the AC_DATA_HOME directory
10 The installer copies prerequisite files to the destination directory, as shown in
Figure 5‑8. After copying the prerequisite files, the installation continues.
Figure 5‑8 Copying prerequisite files
11 Press Enter to choose the default option, Server with Management Console, as shown in
Figure 5‑9. A cluster node must have access to Configuration Console. Configuration Console installs with Management Console.
Figure 5‑9 Choosing the components to install
12 Type 1 and press Enter to select Cluster Server for installation, as shown in
Figure 5‑10. Alternatively, choose a different type of iHub to install.
Figure 5‑10 Specifying the type of iHub to install
13 Specify the path to the configuration home location, and press Enter, as shown in
Figure 5‑11.
The configuration home location is the shared directory of the cluster containing the files, acserverconfig.xml, acserverlicense.xml, and acconfigowner.lock. In an iHub installation, the configuration files are located in AC_DATA_HOME/config/iHub2 by default. For more information about configuring network sharing, see
“Adding a node to a cluster,” later in this chapter.
Figure 5‑11 Specifying the configuration home location
14 If the specified location for the configuration home directory does not yet exist, you are prompted to create the directory. Press Enter to accept the default option which creates the directory, as shown in
Figure 5‑12. Alternatively, press n for no, or q to quit.
Figure 5‑12 Creating the configuration home location
15 If you chose to install Server with Management Console instead of Server only, perform the following steps:
1 Press Enter to select the default locale, which is English (United States), as shown in
Figure 5‑13. Alternatively, select a different locale. If you do not see the locale for your region, type m for more and press Enter.
Figure 5‑13 Specifying a locale
2 Press Enter to select the default time zone, which is America/Los_Angeles as shown in
Figure 5‑14. Alternatively, select another time zone from the numbered list.
Figure 5‑14 Specifying a time zone
16 To evaluate the product using the included evaluation software license, press Enter, as shown in
Figure 5‑15. Alternatively, type 2, then type the path to the license file that you purchased.
Figure 5‑15 Specifying license type
17 Press Enter to select the default host name, the name of your machine, where the Process Management Daemon (PMD) runs, as shown in
Figure 5‑16. Alternatively, type a different IP address or hostname.
Figure 5‑16 Specifying the machine on which the PMD runs
18 Press Enter to accept the default port number where the Process Management Daemon (PMD) listens for requests, as shown in
Figure 5‑17. Alternatively, type a different port number.
Figure 5‑17 Specifying the port number on which the PMD listens
19 Specify the administrator password, as shown in
Figure 5‑18.
You use this password to log in to the iHub Configuration Console.
Figure 5‑18 Specifying the administrator password
20 Re-enter the password of the administrator, as shown in
Figure 5‑19.
Figure 5‑19 Re-entering the administrator password
21 Press Enter to accept the default option of not using any database drivers/clients, as shown in
Figure 5‑20. Alternatively type y for yes, specify the database drivers/clients you wish to use and press Enter.
Figure 5‑20 Specifying whether to use database drivers/clients
22 Specify what kind of X-Server you want to use, if any. To accept the default, press Enter, as shown in
Figure 5‑21. For more information about installing X‑server, see
“Installing X-frame buffer,” earlier in this chapter.
Figure 5‑21 Specifying what kind of X-Server to use, if any
23 If you chose to install Server with Management Console instead of Server only, perform the following steps:
1 Press Enter to accept the default hostname, the name of your machine, that Management Console uses to contact the Process Management Daemon (PMD), as shown in
Figure 5‑22. Alternatively, type a different IP address.
Figure 5‑22 Specifying the machine host name that Management Console uses to contact the PMD
2 Press Enter to accept the default port number, 8100, on which the Process Management Daemon (PMD) listens for requests from Management Console, as shown in
Figure 5‑23. Alternatively, type a different port number.
Figure 5‑23 Specifying the port number for the PMD to listen for requests from Management Console
3 Press Enter to accept the default hostname, the name of your machine, as shown in
Figure 5‑24. Alternatively, type a different IP address.
Figure 5‑24 Specifying the name Management Console uses to contact iHub
4 Press Enter to accept the default port number, 8000, as shown in
Figure 5‑25. Alternatively, type a different port number.
Figure 5‑25 Specifying the port number for listening for requests from Management Console
5 Press Enter to accept the default name, the name of your machine, for the Encyclopedia volume to use with Management Console, as shown in
Figure 5‑26. Alternatively, type a different name for the Encyclopedia volume.
Figure 5‑26 Specifying the name of the default Encyclopedia volume
6 Press Enter to accept the default name, acadmin, for the HTTP server context root, as shown in
Figure 5‑27. Alternatively, type a different name.
Figure 5‑27 Specifying the name of the HTTP server context root
24 Press Enter to accept the default port number, 8900, on which the application container listens for requests, as shown in
Figure 5‑28. Alternatively, choose a different port.
You connect to the port from your browser when accessing various features of iHub.
Figure 5‑28 Specifying the application container listening port number
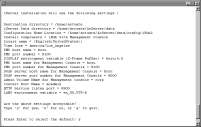
25 Review the settings, as shown in
Figure 5‑29, then specify whether you accept the settings. Press Enter to accept the default, y for yes. Alternatively, type n for no, or q to quit.
Figure 5‑29 Reviewing settings for a Server with Management Console install
26 The installation program installs iHub, and displays an indicator showing how the installation is progressing, as shown in
Figure 5‑30.
Figure 5‑30 Copying iHub files to your destination folder
27 At the end of the installation, the program asks if you want to start iHub. Accept the default, y for yes, to start the Process Management Daemon (PMD), as shown in
Figure 5‑31.
Figure 5‑31 Specifying whether to start iHub
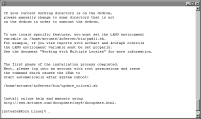
28 When the installation program finishes, it provides additional information about localization, logging in using an account with root permissions to start iHub, and installing online help and manuals, as shown in
Figure 5‑32.
Figure 5‑32 Viewing information about localization, logging in, and installing online help
