How to install the localization and documentation files
To install the iHub localization and documentation files, perform the following steps:
1 After downloading the tar file, decompress it using the tar command:
tar -xvf FILE_NAME.tar
2 To begin the installation, move to the newly decompressed directory and execute the helpinstall script:
sh ./helpinstall.sh
The script displays a series of prompts. Respond to the prompts as described in the following procedures.
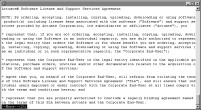
3 The license agreement appears, as shown in
Figure 8‑8.
Figure 8‑8 Reviewing the license agreement
4 Read the license agreement and press Enter to continue installation. At the prompt, type y for yes if you accept the licensing terms, as shown in
Figure 8‑9.
Figure 8‑9 Accepting the license agreement
5 Choose the products that you wish to update in this install, as shown in
Figure 8‑10. If you want to choose more than one, just enter the numbers separated by a space. For example, type 1 2 3 to select all products.
Figure 8‑10 Selecting a product combination
6 Enter the full path of the product installation directory that you chose to update, as shown in
Figure 8‑11. If you chose to update more than one product, you are asked for the full path of every product directory in your selection.
Figure 8‑11 Specifying a product directory
7 Review the settings, as shown in
Figure 8‑12, then specify whether you accept the settings. Press Enter to accept the default, y for yes. Alternatively, type n for no, or q to quit.
Figure 8‑12 Reviewing settings before copying files
8 The installation program starts and displays an indicator showing how the installation is progressing, as shown in
Figure 8‑13.
Figure 8‑13 Copying files to your destination folder
9 When the installation program finishes, it provides additional information about changing the working directory, as shown in
Figure 8‑14.
Figure 8‑14 Viewing information about changing the working directory


