How to install an Encyclopedia volume that uses an alternative database
To install iHub, perform the following steps:
1 Download the required files from the FTP software distribution site. Extract the files.
2 To install the server files, execute the following isinstall script:
sh ./isinstall.sh
The script displays a number of prompts. Respond to the prompts as described in the following procedure.
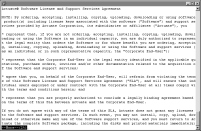
3 The license agreement appears, as shown in
Figure 3‑1.
Figure 3‑1 Reviewing the license agreement
4 Read the license agreement and press Enter to continue the installation. At the prompt, type y for yes if you accept the licensing terms, as shown in
Figure 3‑2.
Figure 3‑2 Accepting the licensing terms
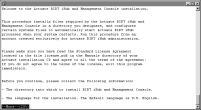
5 The introduction to the installation appears, as shown in
Figure 3‑3.
Figure 3‑3 Reviewing the introductory information
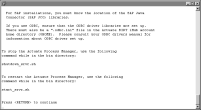
6 Press Enter after reviewing the introductory information, as shown in
Figure 3‑4.
Figure 3‑4 Finishing the review of introductory information
7 Press Enter to accept the default location for the installation, as shown in
Figure 3‑5. Alternatively, type a different directory and press Enter.
The installation program creates the AcServer directory in the chosen location and installs the files.
iHub uses this location to resolve paths to all the binaries that it launches. The default path for this location is $HOME/AcServer, which is referred to in the iHub documentation by the environment variable, AC_SERVER_HOME.
Figure 3‑5 Specifying the installation directory
8 Press Enter to accept the default installation directory, AC_SERVER_HOME/data, for iHub data, as shown in
Figure 3‑6. Alternatively, choose a different directory for iHub data.
iHub uses this data location to store the iHub Encyclopedia volume data, logs, and other files. The default path is AC_SERVER_HOME/data, which is referred to in the iHub documentation by the environment variable AC_DATA_HOME.
Figure 3‑6 Specifying the data installation directory
9 Press Enter to accept the default option of creating the directory for data, as shown in
Figure 3‑7. Alternatively, type n for no, or q to quit, and press Enter.
Figure 3‑7 Creating the AC_DATA_HOME directory
10 The installer copies prerequisite files to the destination folder, as shown in
Figure 3‑8. After copying the prerequisite files, the installation continues.
Figure 3‑8 Copying prerequisite files
11 Press Enter to accept the default iHub component combination, iHub with Management Console, as shown in
Figure 3‑9. Alternatively, choose a different iHub component combination and press Enter.
Figure 3‑9 Choosing the iHub component combination
12 Press Enter to accept the default stand-alone iHub installation, as shown in
Figure 3‑10. Alternatively, choose a different type of iHub to install.
Figure 3‑10 Specifying the type of iHub to install
13 Type a name to use for the BIRT iHub System name, as shown in
Figure 3‑11. iHub assigns this name to the default Encyclopedia volume. Additionally, iHub inserts this name into the names iHub creates for the Encyclopedia volume schema and the iHub system schema.
Figure 3‑11 Specifying the BIRT iHub System name
14 Type n for no, and press Enter, as shown in
Figure 3‑12. You do not want to install the embedded PostgreSQL database if you are using an alternative database such as Oracle to store Encyclopedia volume metadata.
Figure 3‑12 Choosing to not use Embedded PostgreSQL
15 Type 2 to choose Oracle as the external database to work with iHub Encyclopedia and press Enter, as shown in
Figure 3‑13.
Figure 3‑13 Choosing an external database for iHub Encyclopedia
16 Specify the external Oracle database TNS server, if any, and press Enter, as shown in
Figure 3‑14. If there is no external Oracle database TNS Server, leave the field blank and press Enter.
Figure 3‑14 Specifying the external Oracle database TNS Server
17 Specify the name of the external Oracle database host name or IP address and press Enter, as shown in
Figure 3‑15.
Figure 3‑15 Specifying the external Oracle database server name
18 Specify the external Oracle database port number and press Enter, as shown in
Figure 3‑16. Typically, Oracle uses port 1521 as the database port.
Figure 3‑16 Specifying the external Oracle database port
19 Specify the external Oracle database service name, such as orcl.actuate.com, that identifies the Oracle database server on which you want to install the Encyclopedia volume metadata and press Enter, as shown in
Figure 3‑17.
Figure 3‑17 Specifying the external Oracle database service name
20 Specify the external Oracle database user name, such as iserver, and press Enter, as shown in
Figure 3‑18.
Figure 3‑18 Specifying the external Oracle database user name
21 Specify the external Oracle database user password and press Enter, as shown in
Figure 3‑19.
Figure 3‑19 Specifying the external Oracle database user password
22 Re-enter the external Oracle database user password and press Enter, as shown in
Figure 3‑20.
Figure 3‑20 Confirming the external Oracle database user password
23 Specify the system database schema for iHub, such as ac_corp_system, and press Enter, as shown in
Figure 3‑21.
Figure 3‑21 Specifying the system database schema
24 Specify the System database schema password, and press Enter, as shown in
Figure 3‑22.
Figure 3‑22 Specifying the system database schema password
25 Re-enter the system database schema password and press Enter, as shown in
Figure 3‑23.
Figure 3‑23 Confirming the system database schema password
26 Specify the external Oracle database schema for the Encyclopedia volume, such as ac_corp, and press Enter, as shown in
Figure 3‑24.
Figure 3‑24 Specifying the schema for the Encyclopedia volume
27 Specify the external Oracle database schema password, and press Enter, as shown in
Figure 3‑25.
Figure 3‑25 Specifying the external Oracle database schema password
28 Re-enter the external Oracle database schema password and press Enter, as shown in
Figure 3‑26.
Figure 3‑26 Confirm the external Oracle database schema password
29 Press Enter to select the default locale, which is English (United States), as shown in
Figure 3‑27. Alternatively, select a different locale. If you do not see the locale for your region, type m for more and press enter.
Figure 3‑27 Specifying a locale
30 Press Enter to select the default time zone, America/Los_Angeles, as shown in
Figure 3‑28. Alternatively, select another time zone from the numbered list.
Figure 3‑28 Specifying a time zone
31 To evaluate the product using the included evaluation software license, press Enter, as shown in
Figure 3‑29. Alternatively, type 2, then type the path to the license file you purchased.
Figure 3‑29 Specifying license type
32 Press Enter to accept the hostname of the machine that Management Console uses to contact the Process Management Daemon (PMD), as shown in
Figure 3‑30. Alternatively, type a different IP address.
Figure 3‑30 Specifying the hostname that Management Console uses to contact the PMD
33 Press Enter to accept the default port number, 8100, where Process Management Daemon (PMD) listens for requests, as shown in
Figure 3‑31. Alternatively, type a different port number.
Figure 3‑31 Specifying the port number on which the PMD listens
34 Press Enter to accept the default host name, the name of your machine, as shown in
Figure 3‑32. Alternatively, type a different IP address.
Figure 3‑32 Specifying the machine on which the iHub runs
35 Press Enter to accept the default port number, 8000, where iHub listens for requests, as shown in
Figure 3‑33. Alternatively, type a different port number.
Figure 3‑33 Specifying the port number on which the iHub listens
36 Specify the iHub administrator password, as shown in
Figure 3‑34.
You use this password to log in to the iHub Configuration Console.
Figure 3‑34 Specifying the iHub administrator password
37 Re-enter the password of the iHub administrator, as shown in
Figure 3‑35.
Figure 3‑35 Re-entering the iHub administrator password
38 Press Enter to accept the default option to use a volume name for the Encyclopedia, as shown in
Figure 3‑36. Alternatively, type n for no to not use a volume name for the Encyclopedia, or q to quit the installation.
Figure 3‑36 Specifying whether to use a volume name
39 Press Enter to accept the default Encyclopedia volume name, the name of your machine, as shown in
Figure 3‑37. Alternatively, type a different Encyclopedia volume name.
Figure 3‑37 Specifying the Encyclopedia volume name
40 Press Enter to accept the default option to start iHub automatically, as shown in
Figure 3‑38. Alternatively, type n for no.
Figure 3‑38 Specifying whether to start iHub automatically
41 Press Enter to accept the default option of not integrating LDAP with iHub, as shown in
Figure 3‑39. Alternatively, type n for no, or q to quit the installation.
Figure 3‑39 Specifying whether to integrate LDAP with iHub
42 Press Enter to accept the default option to not use any database
drivers/clients, as shown in
Figure 3‑40. Alternatively, type y for yes, and specify the database drivers/clients you want to use.
Figure 3‑40 Specifying whether to use database drivers/clients
43 Specify what kind of X-Server you want to use, if any. To accept the default, press Enter, as shown in
Figure 3‑41.
Figure 3‑41 Specifying what kind of X-Server to use, if any
44 Press Enter to accept the default hostname of the machine that Management Console uses to contact the Process Management Daemon (PMD), as shown in
Figure 3‑42. Alternatively, type a different IP address.
Figure 3‑42 Specifying the machine host name that Management Console uses to contact the PMD
45 Press Enter to accept the default port number, 8100, on which the Process Management Daemon (PMD) listens for requests from Management Console, as shown in
Figure 3‑43. Alternatively, type a different port number.
Figure 3‑43 Specifying the port number for the PMD to listen for requests from Management Console
46 Press Enter to accept the default hostname, the name of your machine, that Management Console uses to contact iHub, as shown in
Figure 3‑44. Alternatively, type a different IP address.
Figure 3‑44 Specifying the name Management Console uses to contact iHub
47 Press Enter to accept the default port number, 8000, on which iHub will listen for requests from Management Console, as shown in
Figure 3‑45. Alternatively, type a different port number.
Figure 3‑45 Specifying the port number for listening for requests from Management Console
48 Press Enter to accept the default name of the Encyclopedia volume to use with Management Console, as shown in
Figure 3‑46. Alternatively, type a different name for the Encyclopedia volume.
Figure 3‑46 Specifying the name of the default Encyclopedia volume
49 Press Enter to accept the default name, acadmin, for the HTTP server’s context root, as shown in
Figure 3‑47. Alternatively, type a different name.
Figure 3‑47 Specifying the name of the HTTP server context root
50 Press Enter to accept the default port number, 8900, on which the application container listens for requests, as shown in
Figure 3‑48. Alternatively, choose a different port.
You connect to the port from your browser when accessing various iHub features.
Figure 3‑48 Specifying the application container listening port number
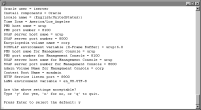
51 Review the settings, as shown in
Figure 3‑49, then specify whether to accept the settings. Press Enter to accept the default, y for yes. Alternatively type n for no, or q to quit.
Figure 3‑49 Reviewing your settings
52 The installation program installs iHub, displaying an indicator that shows the progress of the installation, as shown in
Figure 3‑50.
Figure 3‑50 Copying iHub files to your destination folder
53 At the end of the installation, the program asks if you want to start iHub. Accept the default, y for yes, to start the Process Management Daemon (PMD), as shown in
Figure 3‑51.
Figure 3‑51 Specifying whether to start iHub
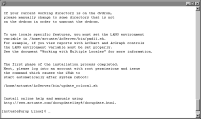
54 The installation program provides additional information about localization, logging in using an account with root permissions to start iHub, and installing online help and manuals, as shown in
Figure 3‑52.
Figure 3‑52 Specifying information about localization, logging in, and installing online help
After the installation program finishes running, open a browser to log in to the following BIRT iHub consoles to perform user and administrator tasks:

Information Console
Perform tasks such as accessing folders and viewing designs and documents.

Management Console
Set up user accounts and schedule or run a design.

Configuration Console
Perform administrative operations, such as adding an Encyclopedia volume and making modifications to iHub parameters and server templates.
For more information on accessing BIRT iHub consoles, see
Chapter 2, “Installing BIRT iHub,” earlier in this book.
