How to modify properties for multiple users
1 On Users, select the individual users whose properties you want to modify.
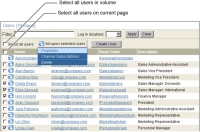
Figure 2‑14 shows all management personnel selected.
Alternatively, to select all users on the page, select the box next to Name. To select all the users in the Encyclopedia volume, select:
Select all users
Point to Act upon selected users.
Figure 2‑14 Select the properties for multiple users
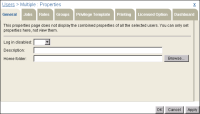
2 On Users—Properties, make the following changes:
1 On General, enable or disable the user logins and change the description and home folder.
Figure 2‑15 shows general properties for multiple users.
Figure 2‑15 Modifying general properties for multiple users
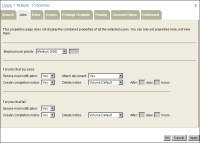
2 On Jobs, set the maximum job priority for the selected users and set notification preferences for jobs that succeed or fail, as shown in
Figure 2‑16.
Figure 2‑16 Modifying job properties for multiple users
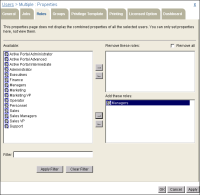
3 On Roles, remove roles from or add roles to selected users by moving the security roles in Available either to Remove these roles or Add these roles. For example, to assign the Managers role to the selected management personnel, move Managers from Available to Add these roles, as shown in
Figure 2‑17.
To remove all roles from the selected users, except roles you assign in Add these roles, select Remove all.
Figure 2‑17 Modifying role properties for multiple users
4 On Groups, remove notification groups from or add notification groups to selected users by moving the groups in Available either to Remove these groups or Add these groups. For example, to assign the Managers group to the selected management personnel, move Managers from Available to Add these groups, as shown in
Figure 2‑18.
To remove all groups from the selected users, except groups you assign in Add these groups, select Remove all.
Figure 2‑18 Modifying group properties for multiple users
5 On Privilege Template, assign privileges to or remove privileges from other users and security roles on items that the selected users create by performing the following tasks:
1 To display the list of roles in Available, select Roles. To display the list of users, select Users.
2 To remove privileges, move one or more roles or users from Available to Remove these privileges. iHub assigns all privileges to a role or user you move to Remove these privileges. Deselect the privileges that you want the role or user to keep.
3 To add privileges, move one or more roles or users from Available to Add these privileges. With the role or user selected, assign privileges from the list of privileges.
4 To remove all privileges any user or role has on items the selected users create, except privileges you assign in Add these privileges, select Remove all.
For example, assign visible and read privileges to the Executives role on any item a selected manager creates by moving Executives from Available to Add these privileges. With Executives selected, assign privileges from the list of privileges, as shown in
Figure 2‑19.
Figure 2‑19 Modifying the privilege template properties for multiple users
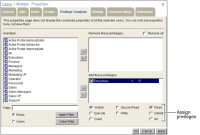
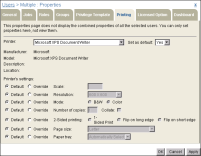
6 On Printing, specify the printer you send the document to, and choose whether it is the default printer. Use default printer settings, as shown in
Figure 2‑20, or selectively override individual printer settings.
Figure 2‑20 Modifying printing properties for multiple users
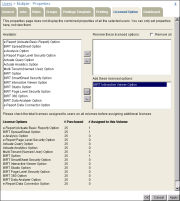
7 On Licensed Option, shown in
Figure 2‑21, assign and remove the licensed options that selected users can access by performing the following actions:

Remove licensed options by moving one or more options from Available to Remove these licensed options. Remove all removes all licensed options from the selected users except licensed options you assign in Add these licensed options.
Assign licensed options by moving one or more options from Available to Add these licensed options. For example, assign the BIRT Interactive Viewer option to all management personnel, as shown in
Figure 2‑21.
License Options lists each licensed option, showing the number of license options purchased as # Purchased and the number of license options assigned to this volume as # Assigned to this Volume.
Figure 2‑21 Adding and removing licensed options for multiple users
Choosing Apply or OK updates the # Assigned to this Volume value for an option you select.
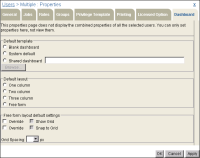
8 On Dashboard, shown in
Figure 2‑22, specify default Information Console dashboard settings for selected users. You can configure the default dashboard template and the default dashboard layout. The default template can be a blank dashboard, the system default dashboard, or you can assign an existing dashboard to the selected users. The default layout can be configured to show one, two, or three columns. Alternatively, you can select a free form dashboard layout, and specify grid settings for it.
A selection you make on Properties—Dashboard overrides the same selection set previously for a selected user.
Figure 2‑22 Configuring default dashboard property settings
Choose OK. Management Console returns to Users.