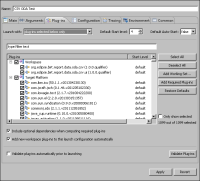
4 Choose the Plug-ins tab to select the list of plug-ins to launch with the run configuration.
5 In Launch with, from the drop-down list, select:
plug-ins selected below only
In Plug-ins, select the following plug-ins, as shown in Figure 25‑11.
org.eclipse.birt.data.oda.csv
org.eclipse.birt.data.oda.csv.ui
Figure 25‑11 Selecting required plug-ins for launch configuration
The plug-ins selected below only option supports configuring an environment that uses a subset of the plug-ins from the workspace and the target platform. The target platform consists of all the plug-ins that are explicitly checked on the Window—Preferences—Plug-in Development—Target Platform preference page.
When using the option, plug-ins selected below only, ensure that the list of selected plug-ins is up to date when you add or remove a plug‑in from the workspace. Use the Add Required Plug-ins button often to ensure the selected subset of plug-ins is complete.
6 To launch the run-time workbench, choose Run.
How to create a report design
1 In the run-time workbench, choose the Report Design perspective.
2 In Report Design, choose File➛New➛Project.
3 Expand Business Intelligence and Reporting Tools and select Report Project. Choose Next.
4 In Report Project, in Project name, type:
testCSVODA
5 Choose Finish.
6 In Navigator, right-click testCSVODA and choose New➛Report.
7 In New Report, in Enter or select the parent folder, select testCSVODA.
8 In File name, type or accept the default value:
new_report.rptdesign
Choose Finish.
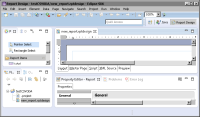
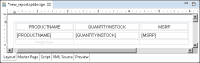
In Navigator, new_report.rptdesign appears in the testCSVODA project folder and an empty report layout appears in the layout editor, as shown in Figure 25‑12.
Figure 25‑12 new_report.rptdesign in the report design environment
How to specify a CSV data source and data set
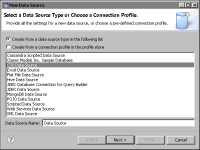
1 In Report Design, choose Data➛New Data Source. In New Data Source, select CSV Data Source, as shown in Figure 25‑13. Choose Next.
Figure 25‑13 Choosing CSV Data Source
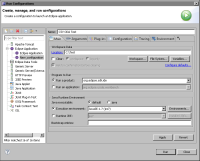
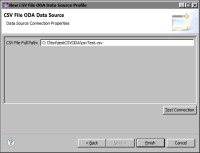
2 In New CSV File ODA Data Source Profile, type the path and file name of the CSV data source file, as shown in Figure 25‑14. Note that the Test Connection function has not been extended for this dialog and will not work to check for the file. Choose Finish.
Figure 25‑14 Specifying path to the CSV ODA data source file directory
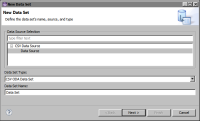
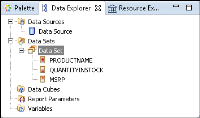
3 In Report Design, choose Data➛New Data Set➛New Data Set. New Data Set appears, as shown in Figure 25‑15. Choose Next. Query appears.
Figure 25‑15 New Data Set for the CSV ODA data source
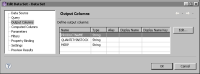
4 In Query, select all the columns, as shown in Figure 25‑16. Choose Finish.