Connecting to files
BIRT Analytics Loader can access data from a text file, or flat file, that conforms to a defined and consistent structure. These files are typically generated by business systems and applications that create logs. These files can also be spreadsheets saved as comma‑separated values (CSV) files. Before using text file data in a load process, make sure the file uses a valid structure. The size of the text files is limited only by the limitations set by the operating system.
BIRT Analytics Loader supports the following options for defining flat file data sources:

Uploading a file from a local system
Uploading a file from a remote system
Uploading multiple files using a file list
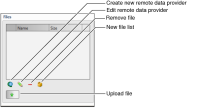
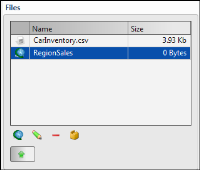
Using BIRT Analytics Loader - Files, you manage data uploads from data files stored on local and remote systems, using the toolset shown in
Figure 3‑10.
Figure 3‑10 Connection tools for flat file data sources
To prepare to access your text files you must know the file name and location.
Uploading local files
After selecting the file, it will be uploaded into the data folder of the load project. Because of network reasons there is a configurable maximum file size available.
How to upload a file from a local file system
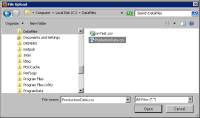
1 In Files, choose the up arrow. File Upload appears, as shown in
Figure 3‑11.
Figure 3‑11 Uploading a local file
2 In File Upload, navigate to the folder where the file is located.
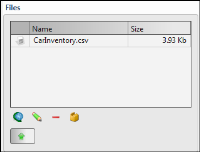
3 Select the file and choose Open. The file appears in Files, as shown in
Figure 3‑12. The local file is stored in the data folder of the project.
Figure 3‑12 Creating a local file data source
Uploading remote files
The remote data provider option allows you to load files using a web address. You have to choose a name, the Uniform Resource Identifier (URI), and the HTTP method (GET, POST).
How to upload a file using URI
1 In Files, select the remote data provider icon. URI appears.
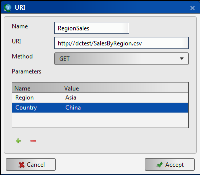
2 In URI, enter the following information, as shown in
Figure 3‑13:
In Name, type the name you want to assign to this data source.
In URI, type the URI, specifying the file location.
In Method, select the method for obtaining the file. Contact the file provider to identify the method.
In Parameters, enter parameters if needed.
Choose + to add parameter. In Name, type the parameter name. In Value, enter the parameter value, as shown in
Figure 3‑13.
To modify a parameter, select a column and change the entry.
Choose - to remove a parameter.
Figure 3‑13 Providing URI properties
3 Choose OK. The new flat file data source appears in Files, as shown in
Figure 3‑14.
Figure 3‑14 Creating a remote file data source
Uploading files using a file list
On many occasions, due to a large data volume and file size restrictions, it is convenient to break the data into multiple files. In such cases you must use a file list to create a file data source and upload the data into a single table.
How to upload files using a file list
1 In Files, upload all the files you want to include in a list, the same way you upload local files.
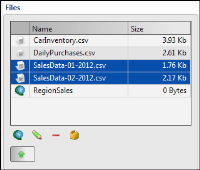
2 Press and hold Ctrl while using the mouse to select multiple file names, as shown in
Figure 3‑15.
Figure 3‑15 List file data source
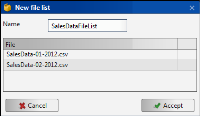
3 In Files, choose New File list. File names that you selected in step 2 appear, as shown in
Figure 3‑16.
Figure 3‑16 Selecting a list file
4 In Name, type a name for the new list file data source, then choose OK.
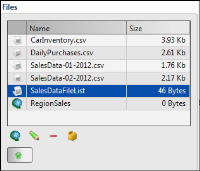
The list file data source appears in Files, as shown in
Figure 3‑17.
Figure 3‑17 Naming a list file data source