After deploying the custom emitter, you can see the new rendering formats displayed along with built-in emitters in the following places:
Preview report in Web Viewer in Actuate BIRT Designer
Output page of schedule job in BIRT Visualization Platform
Attachment notification page of schedule job in BIRT Visualization Platform
Export content in Actuate BIRT Viewer and Actuate BIRT Interactive Viewer
The following examples show the deployment and usage of a custom CSV emitter. The CSV emitter renders a report as a comma‑separated file. The JAR file name is org.eclipse.birt.report.engine.emitter.csv.jar. The custom format type is MyCSV.
To test the emitter functionality with BIRT Visualization Platform, you schedule any BIRT report design or report document from the examples in the Documents/Applications/BIRT Sample App folder. The examples that follow use the report from the sample volume for an iHub:
JREM uses this configuration file at startup to load the registered emitters.
2 Navigate to the end of the file to find the following entry:
<node name="BIRTReportRenderOption">
The entry contains a list of emitter descriptions separated by a semicolon. The emitter description must have the format type and the emitter id separated by a colon. For example, the PDF emitter is described as:
pdf:org.eclipse.birt.report.engine.emitter.pdf;
3 Add your emitter description to the beginning of the <entry name="RenderFormatEmitterIdMapping"> tag:
MyCSV:org.eclipse.birt.report.engine.emitter.csv;
The whole tag would look like this:
<nodename="BIRTReportRenderOption">
<!-- The value is "render_format:emitter_ID" separated by ";", for example, pdf:org.eclipse.birt.report.engine.emitter.pdf;
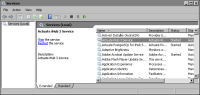
3 Open a report design and choose Run➛View Report. The new CSV format appears in the list of formats, as shown in Figure 49‑3.
Figure 49‑3 List of available formats in BIRT Designer
How to export a BIRT report from iHub
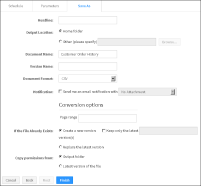
Schedule a BIRT report to run by choosing Save As on the Schedule page. The new CSV format appears in the document format list. You can also select to attach the output report to an e-mail notification, as shown in Figure 49‑4.
Figure 49‑4 Save As tab in the Schedule Jobs page in BIRT Visualization Platform
How to export a BIRT report from Actuate BIRT Viewer or Actuate BIRT Interactive Viewer
1 Open a BIRT report in Actuate BIRT Viewer or Interactive Viewer.
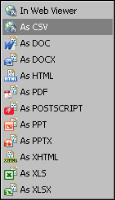
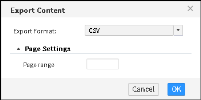
2 Select Export Content from the viewer menu. The new CSV format shows up in Export Format, as shown in Figure 49‑5.
Figure 49‑5 Export Content in Actuate BIRT Viewer
3 Choose OK.
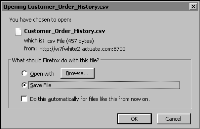
A file download window appears, as shown in Figure 49‑6. You can choose to open or save the file. The default file name is Customer Order History.csv.