Tutorial 1: Writing an event handler in JavaScript
This tutorial provides instructions for writing a set of event handlers. The tutorial shows a basic report design that accesses the Classic Models, Inc. sample database. The design contains a table of customers with a column for the customer name. In this tutorial, you count customer names containing the string, Mini, then display the result in a pop-up window. These event handlers provide functionality equivalent to using an aggregate report item without the use of script.
In this tutorial, you perform the following tasks:
Create a report design that uses the Classic Models, Inc. sample database to display a table listing customer names.
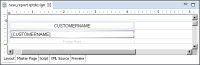
The design appears in the layout editor, as shown in Figure 37‑12.
Figure 37‑12 Report design in the layout editor
Task 2: Create a counter in Table.onCreate
To count the number of customers whose names contain the string Mini, first declare a global counter and set its value to zero. The Table.onCreate method is the most appropriate place to perform this task because Table.onCreate executes before retrieving any rows. In the next task, you conditionally increment this counter in the Row.onCreate( ) method.
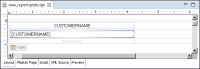
1 In Layout, select the table by placing the cursor near the bottom left corner of the table. The table icon appears, as shown in Figure 37‑13.
Figure 37‑13 List icon in the layout editor
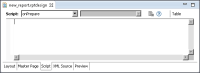
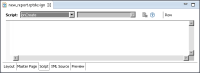
2 Choose the Script tab. The script editor appears, as shown in Figure 37‑14.
Figure 37‑14 Script window
3 Select onCreate from the list of available scripts.
4 Type the following line of code in the script editor for the onCreate method:
countOfMinis = 0;
5 To run the report and verify that the code did not create any errors, choose Preview.
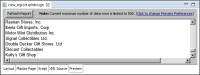
6 Scroll to the bottom of the report, where JavaScript error messages appear. If there are no errors, the report appears as shown in Figure 37‑15.
If you see an error message, you may have typed the statement incorrectly. If so, go back to the script window, select the method you just modified, correct the error, and choose Preview again.
Figure 37‑15 Report preview
Task 3: Conditionally increment the counter
To count the number of customers with the string Mini in their names, examine each customer’s name and add one to the counter for every occurrence. A logical place to perform this task is in the Row.onCreate method, which executes for every retrieval of a row of data from the data source.
1 In Layout, select the Row. Then, choose Script.
2 From the list of available scripts at the top of the script window, select onCreate, as shown in Figure 37‑16.
Figure 37‑16 onCreate( ) in the script window
3 Type the following line of JavaScript code in the script window:
myrow=this.getRowData( );
Notice that when you enter the period after this, a pop-up containing all the available methods and properties, including getRowData appears. This line of code gets an instance of IRowData, which has a method, getExpressionValue( ), to get the contents of a column of the row.
4 Type the following line of JavaScript below the line you typed in step 3:
6 Choose Preview to run the report again to verify that the code you entered did not create any errors.
Task 4: Display the result
To display the count of customers with the string Mini in their names, insert code in a method that runs after the processing of all the rows in the list. One logical place for this code is in the ReportDesign.afterFactory( ) method.
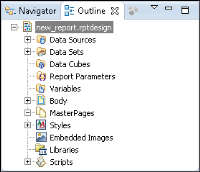
1 In Outline, select the report design, as shown in Figure 37‑17.
Figure 37‑17 Selecting the report design in Outline
2 Select the afterFactory method from the list of available scripts in the script editor.
3 Type the following code into the afterFactory method:
importPackage( Packages.javax.swing );
frame = new JFrame( "Count of Minis = " + countOfMinis );
frame.setBounds( 310, 220, 300, 20 );
frame.show( );
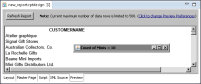
4 Select Preview to see the results. If there are no errors in the code, you see a report similar to the one in Figure 37‑18.
Figure 37‑18 Result of changing the afterFactory( ) method
If you do not see the Count of Minis window, look for it behind the Eclipse window. If the Count of Minis window does not appear, the most likely reason is a scripting error caused by an error in one of your code entries.
If you suspect that a scripting error occurred, scroll to the bottom of the report where all scripting error messages appear. In most situations, there is a brief error message next to a plus sign ( + ). The plus sign indicates that there is a more detailed error message that is only visible after you expand the brief error message. To expand the brief error message, choose the plus sign. Scroll down to see the more detailed error message.