About deploying and sharing applications and files
This section describes how to export and publish BIRT applications in the Actuate business reporting system. You can also download files from an iHub server to use in a BIRT application.
The purpose of publishing a BIRT application to iHub is to make it accessible to a large number of users. A published application is available to manage. For example, you can schedule running a report to include updates from the data sources. You can also use permissions to control access to the application.
To publish BIRT applications, you need to understand the environment in which the reports run. BIRT iHub provides a central location from which business users can access, run, and view reports. You can also use Actuate Information Console to run report executables, and to manage, generate, view, and print report documents.
BIRT Designer Professional, the tool that you use to develop BIRT applications, has built‑in capabilities that facilitate the deployment process. The BIRT Designer Professional integrates with iHub in several important ways to support performing the following tasks:
Use an open data access (ODA) information object data source that resides on a volume.
Publish a BIRT application and its components to a volume.
Publish a resource to a volume.
Install a custom JDBC driver for use by BIRT reports running in the iHub environment.
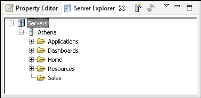
BIRT Designer Professional connects directly to an iHub server and deploys the files to selected iHub folders. The designer provides a Server Explorer view for managing iHub connections. Using Server Explorer, you can create connection profiles to store the connection properties to a specific iHub volume. Figure 42‑1 shows Server Explorer displaying a server profile.
Figure 42‑1 Server Explorer view
How to create a new server profile
1 In BIRT Designer Professional, open Server Explorer. If you do not see the Server Explorer view in the designer, select Windows➛Show view➛Server Explorer.
2 In Server Explorer, right-click Servers, and choose New Server Profile.
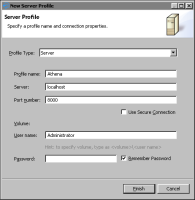
3 In New Server Profile, specify the connection information. Figure 42‑2 displays an example of connection properties provided for a server named Athena.
Figure 42‑2 Setting properties in a new Server profile
1 In Profile type, select Server.
2 In Profile name, type a unique name that identifies the new profile.
3 In Server, type the name or IP address of the iHub server.
4 In Port number, type the port number to access iHub.
5 In Volume, select the iHub iHub volume if multiple volumes exist.
6 In User name, type the user name required to access the volume.
7 In Password, type the password required to access the volume.
8 Select Remember Password, if you want to save the password.
4 Choose Finish to save the Server profile. The Server profile appears in the Server Explorer.