Tutorial 8: Displaying repository contents and opening files
In this tutorial, you author a web page that displays a navigable user interface that displays repository contents and allows a user to open a selected file. You perform the following tasks:
var explorer = new actuate.ReportExplorer("explorer");
explorer.setFolderName( "/Applications" );
var resultDef = "Name|FileType|Version|VersionName|Description";
explorer.setResultDef( resultDef.split("|") );
explorer.submit( );
}
6 Save the file as repositorydisplay.html.
7 In Internet Explorer, open repositorydisplay.html.
If you receive a security warning that Internet Explorer has restricted this page from running scripts or ActiveX controls that could access your computer, right-click on the message and select Allow Blocked Content.
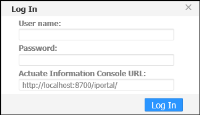
8 If a Login required dialog appears, as shown in Figure 16‑5, type administrator into the User name field and choose Sign in.
Figure 16‑5 Login required dialog
Task 2: Track user selections
In this task, you create or edit JSAPITemplate.html to display the repository contents and track the selections made by the user.
1 Using a code editor, open or create the JSAPITemplate.html file.
2 Navigate to the following line:
<title>JSAPI Template</title>
In title, change:
JSAPI Template
to:
Report Selection Page
3 Navigate to the following line:
<div id="sample">
In id, change:
sample
to:
explorer
4 Navigate to the empty line after the following line:
var resultDef = "Name|FileType|Version|VersionName|Description";
explorer.setResultDef( resultDef.split("|") );
explorer.submit( );
}
function selectionChanged( selectedItem, pathName ){
file = pathName;
alert ("File selected: " + file);
}
6 Save the file as reportselection.html.
7 In Internet Explorer, open reportselection.html.
If you receive a security warning that Internet Explorer has restricted this page from running scripts or ActiveX controls that could access your computer, right-click on the message and select Allow Blocked Content.
Type administrator into the User name field of the Login required dialog, and choose Sign in.
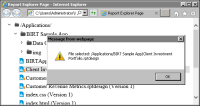
8 On the report explorer, select a file. An alert for the file selected appears, as shown in Figure 16‑6.
Figure 16‑6 File selected alert
Task 3: Open a selected file
In this task, you create a copy of reportselection.html and edit its contents to include a button that opens the selected file in the report explorer.
1 Using a code editor, open reportselection.html from the previous task.
5 After the selectionChanged function definition, add the following code:
function displayReport( ){
var y = document.getElementById('explorer'), child;
while(child=y.firstChild){
y.removeChild(child);
}
var viewer = new actuate.Viewer("explorer");
try {
viewer.setReportName(file);
viewer.submit( );
} catch (e) {
alert("Selected file is not viewable: " + file);
runReportExplorer( );
}
}
6 Save the file as viewselection.html.
7 In Internet Explorer, open viewselection.html.
If you receive a security warning that Internet Explorer has restricted this page from running scripts or ActiveX controls that could access your computer, right-click on the message and select Allow Blocked Content.
Type administrator into the User name field of the Login required dialog, and choose Sign in.
8 Select a report in the report explorer and choose View Report to view the report.