Tutorial 5: Implementing the JSAPI in a web page to display the viewer
This tutorial provides step-by-step instructions for authoring a web page to display a BIRT report in BIRT Viewer. Write a function to display a report in the Actuate Viewer embedded in a web page.
1 Using a code editor, open or create a JSAPITemplate.html file that contains the essential components for any web page that implements the JSAPI.
<!DOCTYPE html PUBLIC "-//W3C//DTD HTML 4.01//EN" "http://www.w3.org/TR/html4/strict.dtd">
If you receive a security warning that Internet Explorer has restricted this page from running scripts or ActiveX controls that could access your computer, right-click on the message and select Allow Blocked Content.
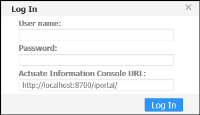
8 A Login required dialog appears, as shown in Figure 16‑1. Type administrator into the User name field and choose Sign in.
Figure 16‑1 Login required dialog
If the page is blank, refresh the browser.
Controlling viewer user interface features
Control the viewer controls and interface features with the actuate.viewer.UIOptions class. Create an instance of this class using JavaScript, as shown in the following code:
var uioptions = new actuate.viewer.UIOptions( );
Set the user interface options with the enable functions in the actuate.viewer.UIOptions class. For example, a toolbar appears in the viewer by default, as shown in Figure 16‑2.
Figure 16‑2 The default toolbar for the JavaScript API viewer
To disable this toolbar, use the following code:
uioptions.enableToolBar(false);
All of the enable functions take a Boolean value as an argument. To configure the viewer to use these options, use setUIOptions( ) as shown in the following code:
viewer.setUIOptions(uioptions);
The setUIOptions( ) function accepts one parameter: an actuate.viewer.UIOptions object. The viewer’s submit( ) function commits the user interface changes to the viewer when the function sends the object to the HTML container. Set the UI options using setUIOptions( ) before calling submit( ).