This section provides step‑by‑step instructions for scheduling a BIRT document job. The user schedules the document using advanced scheduling options, specifies a CSV output format, shares the job with a user group and assigns the necessary access privileges to the group, sets up job success and failure notifications and finally checks the job status using My Jobs and views notifications for the completed job.
In this tutorial, you perform the following tasks:
Run and save a job.
Specify an output format.
Set privileges on the output document.
Set up notifications.
View the status of the scheduled job.
Task 1: Running and saving a job
Log in to Information Console using the URL and credentials provided by your administrator.
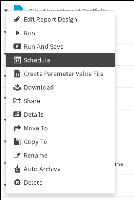
1 Navigate to your home folder. From the menu icon next to the design or document you need to schedule, choose Schedule, as shown in Figure 3‑26.
Figure 3‑26 Choosing to schedule a BIRT document to run
2 In Schedule, choose Advanced Scheduling.
3 In Schedule, complete the following steps:
1 In Job Name, if necessary, type a new name for the job.
2 In Timezone, if necessary, select a new time zone from the list.
3 In Run Job, select Recurring. In the next field, if necessary, select Every Day, and in the next field, type 9:10 AM.
4 In Priority, if necessary, select Medium (500).
5 In Executable Version, if necessary, select Always use version 1 of the BIRT design or document file.
6 In Retry failed jobs, if necessary select Volume Default.
4 The report used in this tutorial does not use parameters. Choose Output.
Task 2: Specifying an output format
In this task you specify options to schedule the document in CSV output format.
1 In Document name, if necessary, type a new name.
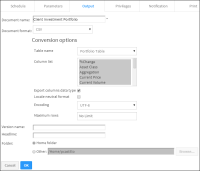
2 In Document format, select CSV, as shown in Figure 3‑27.
Figure 3‑27 Specifying options for the CSV output document
The conversion options for CSV appear.
3 In Table name, select a table from the list.
4 In Column list, if necessary, select the columns in the table to export to the output document.
5 Select Export Column data type.
6 If necessary, deselect Locale Neutral Format.
7 In Encoding, select an encoding format from the list.
8 In Maximum Rows, if necessary, select No Limit.
9 In Version Name, optionally specify a version name.
10 In Headline, optionally type a description for the job.
11 In Folder, if necessary, select Home folder, as shown in Figure 3‑27.
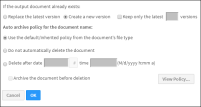
12 In If the output document already exists, if necessary, select Create a new version, as shown in Figure 3‑28.
13 In Auto archive policy for the document name, if necessary, select Use the default/inherited policy from the document’s file type.
Figure 3‑28 Setting version and archiving options for the output document
14 Choose Privileges.
Task 3: Setting privileges on an output document
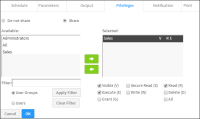
In this task you share the output document with the sales user group and provide Visible, Read, and Execute access privileges to the group to enable them to work with the document.
1 If necessary, select Share.
2 If necessary, select User Groups.
A list of user groups appears in Available.
3 In Available, choose Sales, then select the right arrow.
The Sales user group appears in Selected.
4 Select Visible (V), Read (R), and Execute (E).
The selected privileges appear next to Sales in Selected, as shown in Figure 3‑29.
Figure 3‑29 Sharing the output document and assigning privileges
5 Choose Notification.
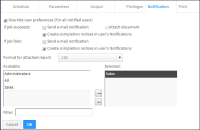
Task 4: Setting up notifications
In this task you specify notification options if the scheduled job succeeds or fails. You also specify options to share the notifications with users or user groups.
1 Select Override user preferences.
2 In If job succeeds, select Create completion notices in user’s Notifications.
3 In If job fails, select Create completion notices in user’s Notifications.
The Format for attached report field displays CSV as the output format.
4 If necessary, select User Groups.
5 In Available, select Sales, then select the right arrow.
Sales appears in Selected, as shown in Figure 3‑30.
Figure 3‑30 Specifying notification options
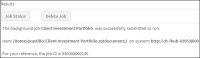
Choose OK to submit the scheduled job. Results appears confirming that the scheduled job was submitted, as shown in Figure 3‑31.
Figure 3‑31 Confirmation of job schedule submission
Task 5: Viewing the status of a scheduled job
In this task, you view the status of the scheduled job and view notifications that appear after the job runs.
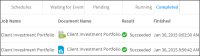
1 In Information Console, in the navigation pane, choose My Jobs.
2 Choose Completed.
The job you submitted appears in the list of completed jobs, as shown in Figure 3‑32.
Figure 3‑32 Viewing completed jobs in My Jobs
3 In the navigation pane, choose Notifications.
The completed job appears in the list, as shown in Figure 3‑33.