Publishing a project
When you are ready to test or deploy a project, you must publish the project to the appropriate volume. You specify the volume by selecting an iHub profile. The iHub profile specifies the iHub, port number, volume, user name, and password.
Report design files and information object files are published to different locations:
*Report design (.rptdesign) files are published to the folder you specify in the Publish to Server dialog. When you publish report design files, you have the option to preserve the folder structure in the project.
*Information object files such as DCDs, SMAs, and IOBs are published to the volume’s resource folder. When you publish information object files, the folder structure in the project is preserved.
You can publish an entire project or individual files. You can replace the latest version of a file or create a new version.
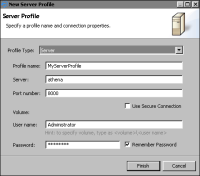
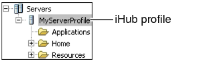
How to create an iHub profile
1 In Server Explorer, right-click and choose New Server Profile.
2 In Server Profile complete the following steps:
1 In Profile Type, select one of the following:
*Server
If you select this option, complete steps 2 to 7.
*Cloud Server
If you select this option, complete steps 8 to 12.
2 In Profile name, type a unique name that identifies the new profile.
3 In Server, type the name or IP address of the computer on which Actuate BIRT iHub is installed.
4 In Port number, type the number of the port to access Actuate BIRT iHub.
5 If necessary, select the option to use a secure connection.
6 In User name, type the user name for accessing the volume.
7 In Password, type the password for accessing the volume.
Proceed to step 12.
8 In Profile name, type a unique name that identifies the Cloud profile.
9 In Cloud Service URL, type the address for your cloud service.
10 Choose Login.
11 In Server Name, select the server to log into.
12 In Volume, select a volume if your server uses multiple volumes.
Figure 4‑2 shows an example of an iHub profile.
Choose Finish.
Figure 4‑2 Specifying an iHub profile
The profile appears in Server Explorer, as shown in Figure 4‑3.
Figure 4‑3 The Server Explorer view showing an iHub profile