Using the System Console configuration user interface
The System Console configuration user interface supports the following actions:
Separating System Console from the System Console metadata database
The name of the database System Console uses is umc. System Console uses umc to store metadata about objects System Console contains, for example, the name, ID, and description of each cluster, all volume names in System Console and the clusters to which the volumes belong, and the name and e-mail address of each system administrator. By default, the System Console install program installs and configures a PostgreSQL database for System Console on the same machine as System Console. The System Console configuration user interface supports System Console creating and using a PostgreSQL metadata database that resides on a different machine.
Updating the System Console metadata database
A scenario this functionality supports is if a database administrator changes the password for the umc database and System Console can no longer connect to umc, a system administrator can specify the new password on the System Console configuration user interface to re-establish connectivity.
How to log in to the System Console configuration user interface
1 Open a new browser window. In the address bar, type the following URL and press Enter:
http://localhost:8500/sysconsole/pages/config.jsp
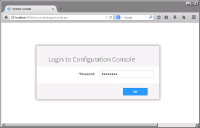
2 On Login to Configuration Console, type the password for sysadmin, the default System Console administrator, as shown in Figure 6‑2. The default password for sysadmin is system11.
Figure 6‑2 Accessing the System Console configuration user interface
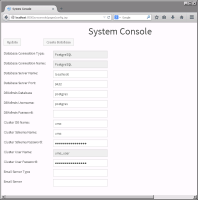
2 On System Console, provide or accept the values for the following properties, as shown in Figure 6‑3.
Database Connection Type
Type of database to connect to. Must be PostgreSQL.
Database Connection Name
Name of the database connection. Must be PostgreSQL.
Database Server Name
Name of the machine containing the database to which you want System Console to connect.
Database Server Port
Name of the port you want System Console to use to connect to the database.
DBAdmin Database
Name of the administrative connection database. This is the database that System Console connects to initially, before System Console creates the umc database and schema.
DBAdmin Username
Name of the superuser that logs in to the DBAdmin Database.
DBAdmin Password
Password for the superuser that logs in to the DBAdmin Database.
Cluster DB name
Name of the System Console metadata database. System Console creates this database when you choose Create Database. Accept the name umc.
Cluster Schema name
Name of the schema containing the System Console metadata. System Console creates this schema when you choose Create Database. Accept the name umc.
Cluster Schema Password
Type a password for the Cluster schema.
Cluster User Name
Name of the user with which System Console logs into the metadata database. Must be umc_user. This user reads and writes to the System Console metadata database.
Cluster User Password
Type a password for the Cluster user.
Email Server Type
Type a name for the mail server. When System Console creates the umc database, System Console sends an e-mail notifying the system administrator if you specify values for Email Server Type and Email Server.
Email Server
Type the IP address or fully qualified domain name of the mail server. For
example, type mailserver.companydomain.com.
3 Choose Create Database.
How to update the System Console metadata database