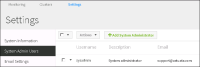
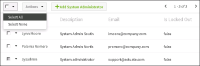
On Settings, choose System Admin Users to work with System Administrator users, as shown in Figure 8‑3.
Figure 8‑3 Working with System Administrator users
Working with System Administrator users includes creating, deleting, and editing a System Administrator user. The following sections describe how to perform these tasks.
Creating a system administrator
A system administrator can create other System Administrator users.
How to create a system administrator
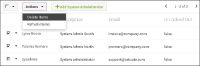
1 On Settings—System Admin Users, choose Add System Administrator to create a new System Administrator user, as shown in Figure 8‑3.
2 Specify the following properties on Add System Administrator, as shown in Figure 8‑4. A property name appearing with an asterisk (*) next to the name is a required property.
Username
Type the name of the new system administrator.
Email
Type the new administrator e-mail address.
Description
Type a description for the new administrator.
Language
Choose the language System Console uses.
Is Locked Out
Type true or false.
Password
In Password, type a password for the new user. The password must be at least eight characters long, and must contain at least one lower case letter, one upper case letter, and one digit. If you create a user using IDAPI, there is no restriction on what the password can be.
Confirm Password
Type the password again.
Choose OK. Confirm that you want to save changes.
Figure 8‑4 Adding a system administrator
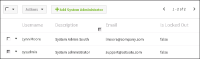
The new System Administrator user appears in the user list, as shown in Figure 8‑5.
Figure 8‑5 Viewing the new system administrator in the list
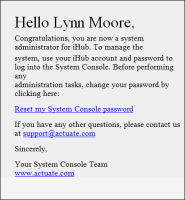
If you have e-mail notification enabled, BIRT iHub sends a notification e-mail to the new system administrator, as shown in Figure 8‑6. For information on enabling e-mail notification, see Enabling e-mail notification.
Figure 8‑6 Viewing the notification e-mail
Customizing the notification e-mail template file
System Console uses a .properties file with a .template file to create a notification e-mail for each of the following events:
New system administrator created
New cluster created
New trial cluster created
New volume created
The .properties file contains the text for each e-mail type. The .template file contains the HTML for each e-mail type. The .template file formats the notification e-mail, and populates it with appropriate text from the .properties file.
You can edit the .properties and .template files to customize them for your entity.
How to customize the notification e-mail files
1 In a default BIRT iHub installation on Windows, in which the install folder is C:\Actuate3, navigate to the following file:
Using a file utility such as WinZip, open \resource.jar.
2 Locate the following files:
com\actuate\umc\data\resource\Email.properties
com\actuate\umc\data\resource\Email.template
Open these files and make any necessary modifications.
Save and exit the files.
Editing a system administrator
When editing a system administrator, the properties are the same as when creating a system administrator, and the administrator can change any property.
How to edit a system administrator
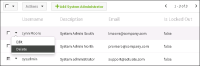
1 Left-click the arrowhead icon next to the System Administrator user in the list of users and choose Edit to edit a System Administrator, as shown in Figure 8‑7.
Figure 8‑7 Choosing to edit a system administrator
2 Make any necessary changes on Edit <System Administrator name> and choose Save.
Deleting system administrators
The system administrator can delete one System Administrator user only, or multiple users simultaneously.
You cannot delete the default system administrator, sysadmin.
How to delete a single administrator
Left-click the arrowhead icon next to the System Administrator user in the list of administrators and choose Delete to delete an administrator, as shown in Figure 8‑8.
Figure 8‑8 Deleting a system administrator
How to delete selected administrators
Check the boxes next to the administrators you want to delete. Then, left-click Actions and choose Delete Items, as shown in Figure 8‑9. Choose Refresh Items to deselect selected administrators.
Figure 8‑9 Deleting one or more users
How to delete all administrators
Delete all system administrators except sysadmin, the default administrator, by performing the following tasks:
1 Left-click the arrowhead icon in the check box next to Actions and choose Select All, to select all administrators, as shown in Figure 8‑10. Alternatively, choose Select None to deselect all administrators.
Figure 8‑10 Selecting all system administrators
2 Left-click Actions and choose Delete Items, as shown in Figure 8‑11. Alternatively, select Refresh Items to deselect administrators.
Figure 8‑11 Deleting all administrators except sysadmin