To use the this object, type the keyword, this, followed by a period in the script window for the event handler. A scrollable list of all the properties and functions for the element appears, as shown in Figure 37‑2.
Figure 37‑2 Using the this object to display a list of functions and properties
Scroll down the list and press Enter or double-click when the property or function you want is highlighted.
Using the this object to set a report item property
This list of properties and functions is available for other objects as well as this object. The following procedure sets the background color of a label to yellow. The general process explained in this procedure is not specific to the label report item. All report item event handlers support this functionality.
How to set a property of a report item using JavaScript
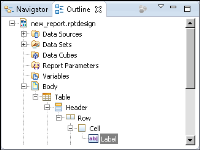
1 Select a label by navigating in the Outline view, as shown in Figure 37‑3.
Figure 37‑3 Selecting a report item to modify
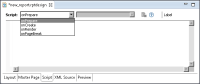
2 Select onPrepare in the Script editor, as shown in Figure 37‑4.
Figure 37‑4 Selecting onPrepare( )
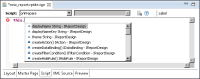
3 In the onPrepare script editor, type the keyword this, followed by a period to open the list of properties and functions, as shown in Figure 37‑5.
Figure 37‑5 Using the this object
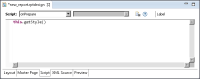
4 Select the getStyle( ) method from the list. The onPrepare script editor appears, as shown in Figure 37‑6.
Figure 37‑6 The onPrepare script window
5 Move the cursor to the end of the line in the onPrepare script window and type a period. The scrollable list of properties and functions of the Style element appears, as shown in Figure 37‑7.
Figure 37‑7 Properties and functions of the Style element
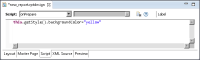
6 Select backgroundColor from the list of Style properties and functions. Complete the line of JavaScript in the onPrepare script window by typing ="yellow" as shown in Figure 37‑8.
Figure 37‑8 Changing the color of an element
7 Choose Preview to see the effect of the onPrepare event handler script. The label has a yellow background in the report, as shown in Figure 37‑9.