Use a grid to arrange static elements, such as text and pictures, in a section. The grid is similar to the HTML table in a web page. It is ideal for creating report title sections and page headers and footers, as shown in Figure 6‑2 and Figure 6‑3.
Figure 6‑2 Report title section
Figure 6‑3 Report footer section
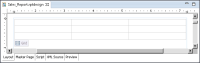
When you place a grid on the page, the layout editor displays a row‑and‑column structure, such as the one shown in Figure 6‑4. By default, all the columns have the same width, and all the rows have the same height.
Figure 6‑4 Row-and-column structure of a grid
The grid layout automates the task of aligning blocks of content. When you place report elements in the cells, the report elements are automatically aligned horizontally and vertically. If you have used other reporting tools that provide a freeform layout editor that lack this capability, you will appreciate the automatic alignment feature that the grid provides. Placing report elements and then aligning them manually is time consuming.
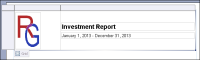
You can add, delete, and resize rows and columns in the grid, as needed. Figure 6‑5 shows a report title section that consists of a picture and two text elements, arranged in a grid with one row and two columns of different sizes.
Figure 6‑5 Grid displaying resized rows and columns
You can also format individual rows, columns, and cells to customize their size, color, borders, and text alignment. Formatting report content describes these tasks.
Adding rows and columns
When you insert a grid, you specify a number of rows and columns. Depending on the number of report elements that you place in the grid, you may need to add rows or columns later.
How to add a row or column
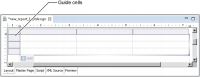
1 In the layout editor, hover the mouse pointer over the bottom left corner of the grid until you see the Grid tab, then choose the tab. Guide cells appear at the top and left side of the grid, as shown in Figure 6‑6.
Figure 6‑6 Guide cells support adding rows and columns
2 Right-click the guide cell in line with the space where you want to add a row or column.
3 Choose one of the following items from the context menu to add a row or column in the desired location:
Insert➛Row➛Above
Insert➛Row➛Below
Insert➛Column to the Right
Insert➛Column to the Left
Deleting rows and columns
If you do not place report elements in all of the grid’s rows or columns, you can delete the empty rows and columns. Empty rows and columns have different effects on different output formats. By default, empty rows do not appear as blank space in HTML and PDF formats. If you want an empty row to appear as blank space in these formats, set the row to a specific size. Empty rows and columns, however, appear as blank space in DOC and XLS formats.
How to delete a row or column
1 In the layout editor, hover the mouse pointer over the bottom left corner of the grid until the Grid tab appears, then choose the tab. Guide cells appear at the top and left side of the grid.
2 Right-click the guide cell of the row or column to delete, then choose Delete from the context menu. If the row or column contains elements, the elements are also deleted.